3

I'm creating Audiobooks via Adobe Premiere Pro and to do so I've created an image via Adobe Photoshop (3200x1800) and applied that as the only still image in the Adobe Premiere workshop with the audio of the book playing along. I've noticed that the quality of the video is very poor even if it is exported in 720p. How can I get the quality same as the original photo? Ps: I'm new to Adobe Premiere Pro.

This is the comparison between the original image and the quality of the frame from the exported video :

enter image description here

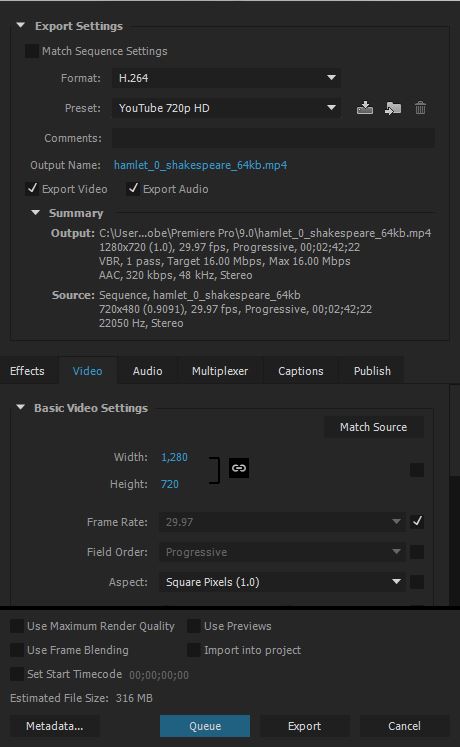
And my Export Settings are:

enter image description here

1 Answer 1

1

Firstly it looks like your sequence is 720x480, i.e. standard definition DV NTSC. This is the default sequence for Premiere, and has been since dinosaurs roamed the earth. Since it's about 1/16th the resolution of your image, not to mention that the pixels are non-square it's no wonder that there will be some quality loss.

If you're finishing at 720p (i.e. 1024*720) you should set your sequence to match. You'll have to either start a new sequence using the HDV 720p setting and copy everything across to it…
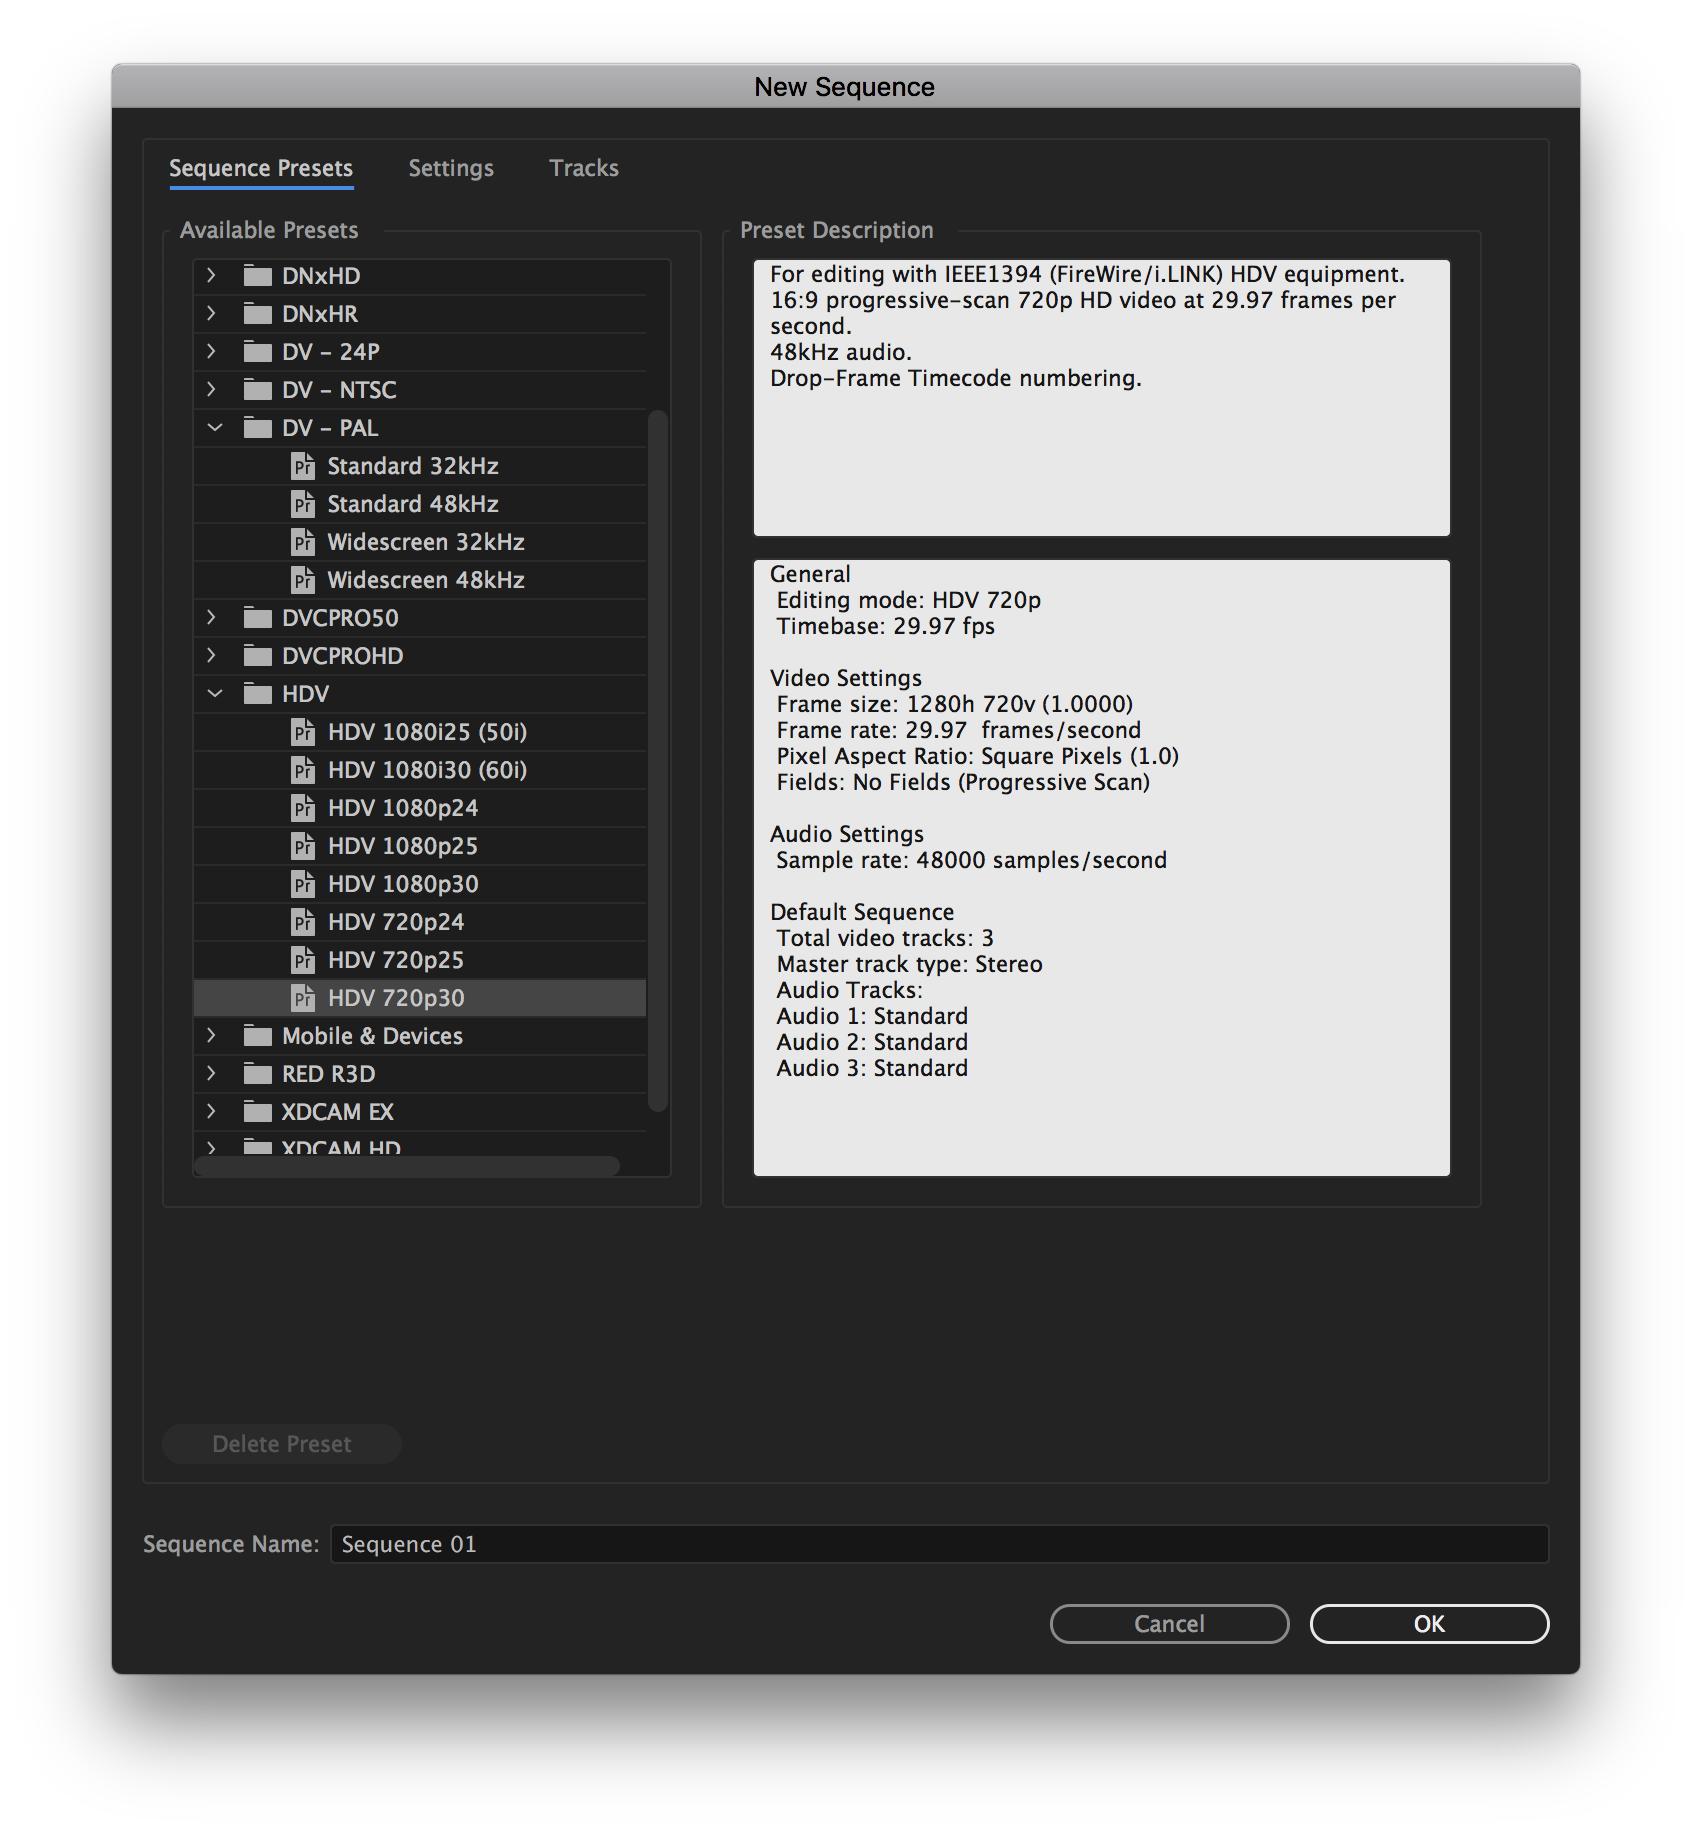
enter image description here

or cut everything from the timeline, change the sequence settings to match those in the picture below and paste everything back.
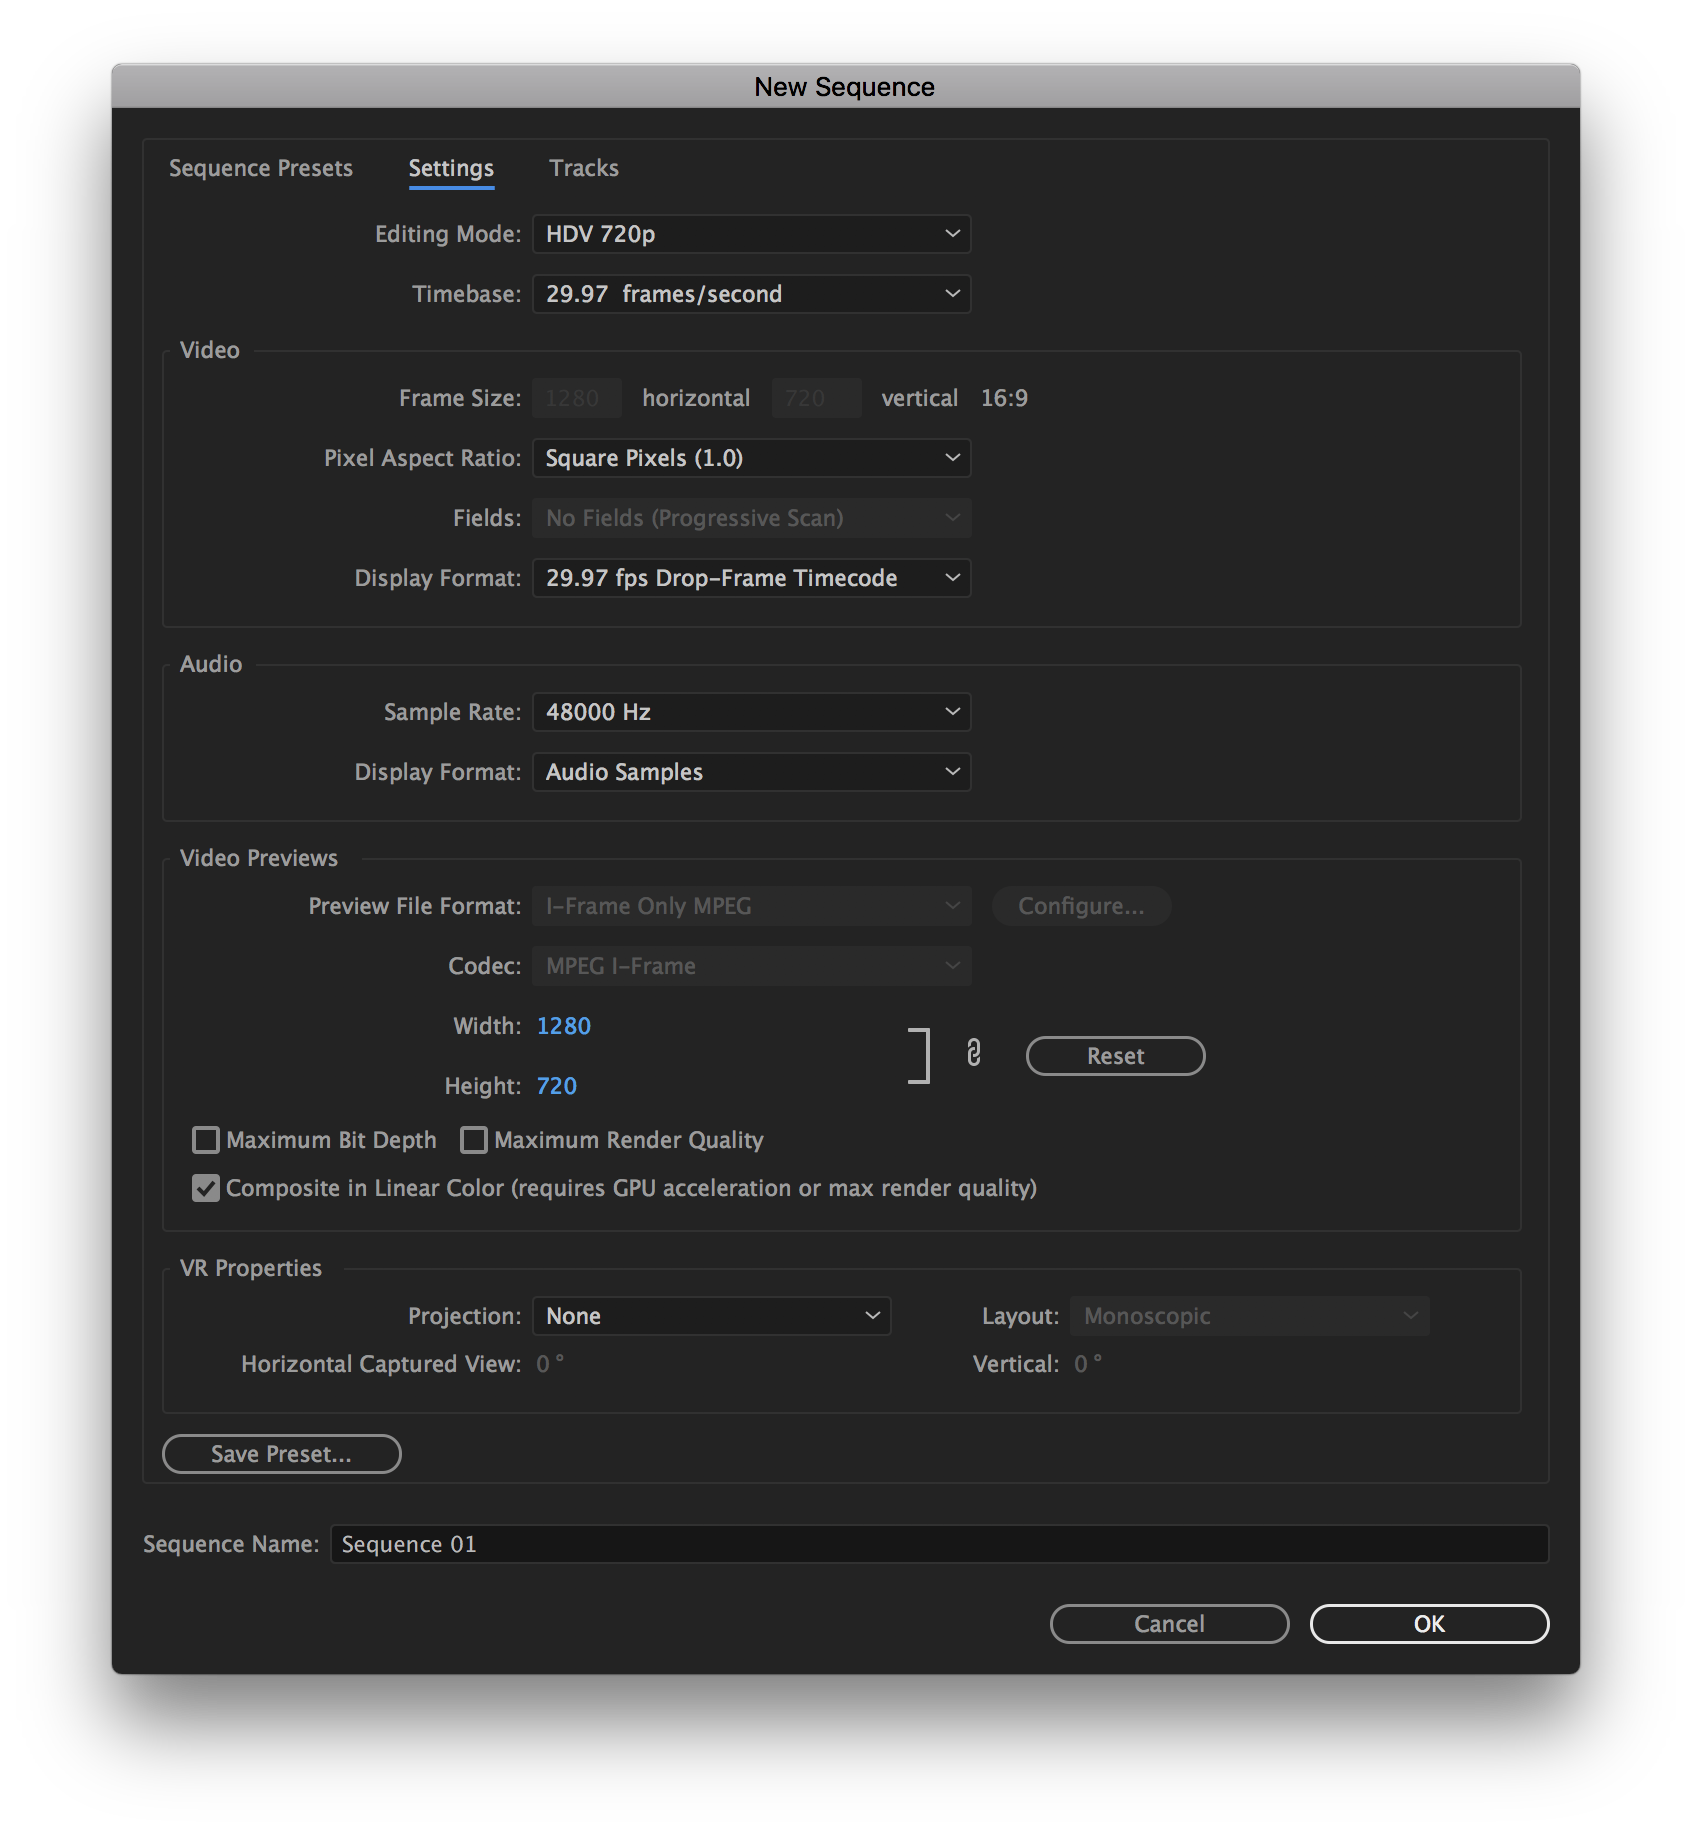
enter image description here

N.B make sure that as well as setting the right resolution you also choose square pixels for your pixel aspect ratio. To make your clips match the sequence size you can right-click them and choose Set to frame size. If there are a lot of similar clips you can do the first one, copy it, select the rest and choose edit>Paste Attributes.

Secondly, you're better off creating your image at the final resolution - you won't gain anything by working at a higher resolution than your final product. Working at the native resolution also gives you a good idea of how it's going to look. Photoshop has film and video presets, so choose the correct one when you're setting up your image file.

2
  • 1
    Out of curiosity, how are you taking those nice clean screenshots with the dropshadow? °v°
    – MoritzLost
    Commented Apr 26, 2017 at 12:52
  • 2
    On a mac: Shift+cmd+4 to bring up the screen grabber tool, then hover over the window and hit the spacebar, which selects the window then hit return to take the screenshot. On windows there's a good tool called Greenshot that does a similar thing.
    – stib
    Commented Apr 26, 2017 at 23:28

Your Answer

By clicking “Post Your Answer”, you agree to our terms of service and acknowledge you have read our privacy policy.

Not the answer you're looking for? Browse other questions tagged or ask your own question.