Short Answer
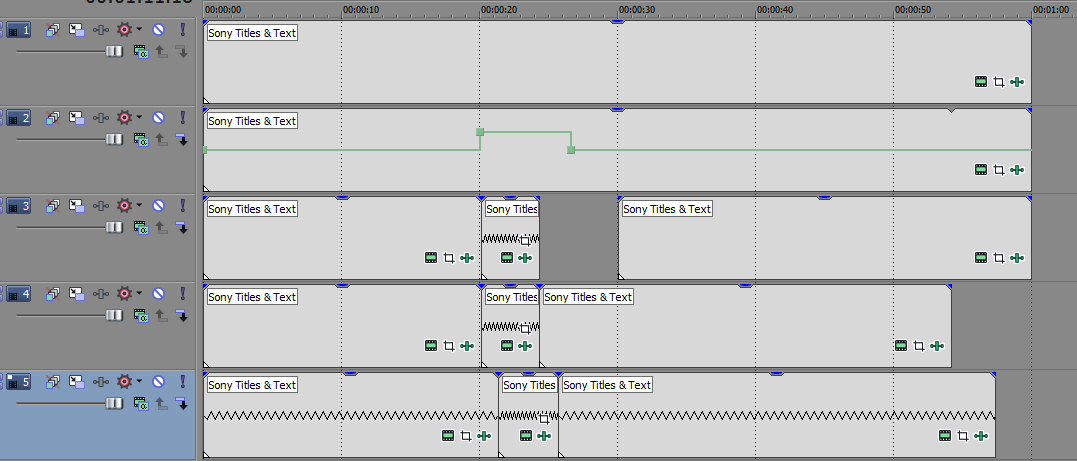
- Split your Video track into separate Events;
- Adjust the Events individually by dragging them along the timeline and stretching/expanding them;
- Overlap the adjacent Events so that there were no gaps;
Long Answer
I find one of the most valuable features of Sony Vegas its ability to split the original tracks into Events and adjust them individually. As I wrote in another answer, playing with Track's Velocity or Velocity envelope appears to be inefficient.
Also, no plugin will detect the best moments in timeline for transitions. Doing this manually seems a bit boring at the first glance, but it will certainly give you the best result.

Full scale image here
Note, this image shows splitting of a single track, but in your case it would be two Grouped tracks, one is Video and another one is Audio.
Here's how I would align Audio and Video tracks to accomplish your goal:
- Decide what Tracks are to be adjusted. Since you probably have a high-quality Audio and you worry about any distortions, let us assume your HQ Audio remains intact. Moreover, since the video is filmed in double framerate, there's no worry of possible artifacts appear after adjustments.
- So, place both Video and Audio tracks to the timeline.
Note, if the Video track goes with some Audio, you will have three tracks:
- Video
- Its accompanying Audio (to be discarded in the future)
- A high-quality Audio
- Make a temporary adjustment of Audio volume so that you could hear both Audio tracks. It can be 50% for each, or you may set them to left/right channel, depending on the nature of the audio. You will revert this at the end;
- Find the moments of any mismatches. The best way to do is by finding drums or some other sharp sounds. Zooming Tracks' height will also be helpful as it lets you see the audio peaks on the histogram;
- At each moment of mismatch, split the Video event (along with its accompanying sound since they are Grouped); Don't do it straight on the peaks. ½ seconds earlier is a better idea.
- Shift the Video to right or left so that it matched;
Note, Shift+dragging ignores grid, markers, fade-in/fade-out marks, and all other time points that otherwise would cause "sticking".
- Repeat for the rest of your composition;
- Now, on the Video track, drag the left/right edges of each Event and Ctrl+drag them to change the playback speed of individual Events. Your final goal is to make the speed matched firmly.
- Manage the overlap of the Events. Make sure you have standard Fade as your Transition Effect, not another fancy one. Make sure the Transition is not longer than ¼ of second (at 60 FPS, it would be 15 frames), or otherwise you get video artifacts.
- After you complete, simply turn off the original low-quality Audio track.
Also note that the split points are best when the picture movement is minimal. For instance, if you have a drum player, the best would be when his/her hands are in the lowest point of hitting the drums, not raised.
