To truly match the original export settings, you need to be clear as to what those settings are.
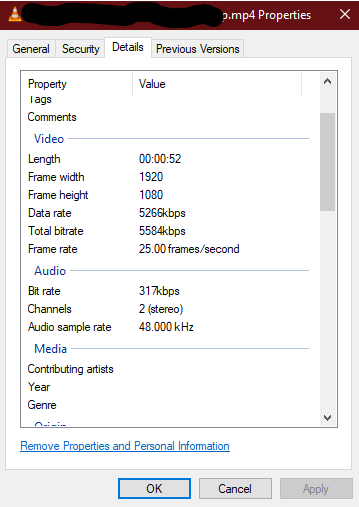
Find the file in file explorer, right click, and go to properties. Go to the details tab and you should find an information list like the below.

This shows you the width, height, length and bitrate of the video. Along with the format, these are the key things that will determine final video size.
Open your file in Premiere Pro, open the relevant timeline and then Press CTRL + M or go to File > Export > Media to open the export window.
Select H.264 as the format (standard encoding) and select a preset such as "Match source - medium bitrate". This however will only match the timeline source, and not necessarily the settings of any video that are added to the timeline. However, by selecting a standard preset like this, any custom settings that you have previously chosen will be wiped clean. As you may have selected an option previously that might be upsetting your file size, this will reset those options to a standard preset.

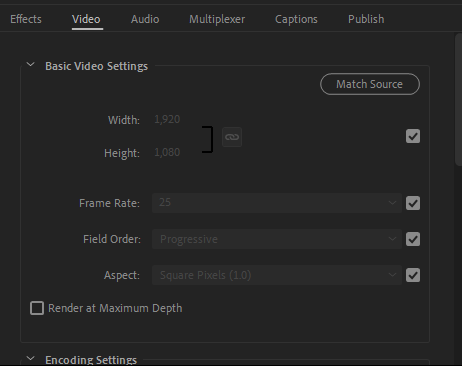
In the tabs further down, check the width and height. If they don't match the settings of your original file as illustrated in the first screenshot, uncheck the box to the right and then manually adjust these settings. You should also check Frame Rate in the same way. - this can't be found in the windows property dialogue, but Premiere Pro will give you this information.

Next, scroll further down to the Bitrate settings. Choose VBR 1 pass (2 pass won't change file size much, but increases render accuracy). Then change the Target Bitrate ot match the bitrate you found in your original file as demonstrated in the first screenshot.

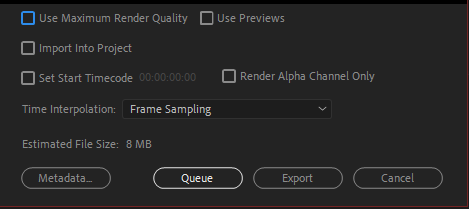
This should very closely replicate your original file. Before you Queue or Export your video to render, check the "Estimated file size" at the bottom. This is usually fairly accurate and should tell you if the exported file will be about the right size or not.

Hope that helps, feel free to comment.
